Which motherboard is best for me?
Motherboards support so many features and new technologies that picking one can start to become a bit overwhelming. If you’ve read some of my other posts you’ll know I like breaking things down logically into steps. I’ve come up with 8 steps that will hopefully make the selection process simpler.
Step 1: Filter your choice of Motherboards to match the correct socket size
Before choosing your motherboard you should have already selected your processor. The socket size your CPU plugs into needs to match the socket size on the motherboard.
It may sound obvious but it’s easy to waste time browsing online only to realise later that the motherboard you thought was perfect has the wrong socket size.
Step 2: Find the right Chipset for you
The chipset manages the flow of data between the processor, memory and expansion slot components on the computer’s data highway, the system bus.
If the processor is the brain of the computer, you could say the chipset is the heart pumping blood-like data. Yes I know, there’s probably many flaws to this analogy but the important thing to understand is how important the chipset is when choosing a motherboard. Don’t fall into the trap of just looking at the slots and connectors available.
The more complex features the chipset supports, the more functionality on the motherboard. Manufacturers have a general categorization of chipsets and the ones we’ll look at are the X, Z and H series.
X series (extreme) are targeted at extreme gamers with very high budgets who want amazing performance and overclocking. Z series (performance) are for gamers on medium budgets and everyone else who is looking for high end, feature-rich boards. These also feature overclocking and SLI. H series are for everyone else and are more suited to ‘normal’ use.
Choosing the chipset series first will target your search based on your needs and will make it easier to narrow down the results.
Step 3: Does the motherboard support Overclocking?
Overclocking allows you to safely push the processer past its normal clock speed achieving better performance. This is usually the domain of gamers and users who need high end workstations.
If you plan to overclock and you have already picked an unlocked CPU, this is the time to check the motherboard supports overclocking.
Step 4: Check the memory type and the number of DIMMS available
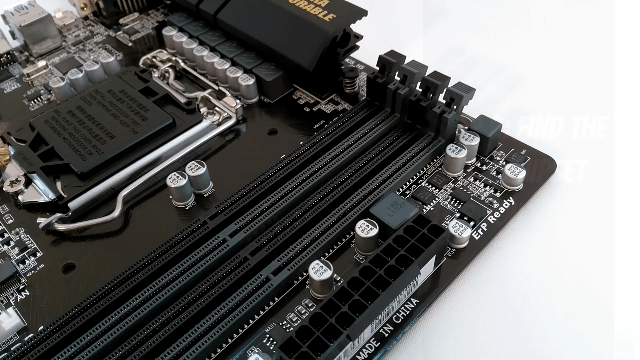
Older motherboards support DDR3 memory whereas newer motherboards support a variant of DDR3, DDR3L or the newer DDR4 memory. Your choice here will be determined by the memory your processor supports. Currently I can’t see any real price difference between DDR3L and DDR4 and so I would recommend using DDR4.
The slots that the computer’s memory (RAM) fit into are called DIMMS. The number of DIMMs on the motherboard dictate how much memory is supported with two slots typically supporting less memory than four or more slots.
The slots actually work together in dual or quad channel mode which means memory performs better in pairs. So a pair of 4GB RAM modules in two DIMM slots perform better than one 8GB RAM module in one slot.
Pick motherboards that support the amount of memory you need taking into account the number of DIMM slots and dual/quad channel support.
Step 5: Pick the size of the motherboard (Form factor)
Motherboards come in 3 main sizes: ATX (full size), Micro ATX (medium size) and Mini ITX (small size).
The ATX size has enough space to offer more expansion slots whereas the Mini ITX is designed for compact builds, Micro ATX is a good mix of both. You can still fit a smaller motherboard into a larger case because of the way they are designed. This gives you more flexibility with the choice you make now.
Step 6: Choose the type and number of expansion slots
Expansion slots allow you to add, remove and upgrade components like graphics cards, SSD drives and wireless cards and are a great way to extend the life of your computer. These PCI Express (PCIe) slots (or the older PCI slots) connect directly to the motherboard’s data bus to become part of the motherboard.
These slots vary in size like x16 and x4 and determine how fast data is transferred, so x16 transfers at 16 GB/s and x4 transfers at 4 GB/s. Most motherboards also include one or two older slower PCI slots should you need them.
PCIe slots are quite flexible by design allowing smaller expansion cards to be slotted into larger slots as well.
Gamers and users who need high end graphics cards should look at the layout of the PCIe slots. Some motherboards are designed to accommodate extra long or wide graphics cards and other support Crossfire and SLI.
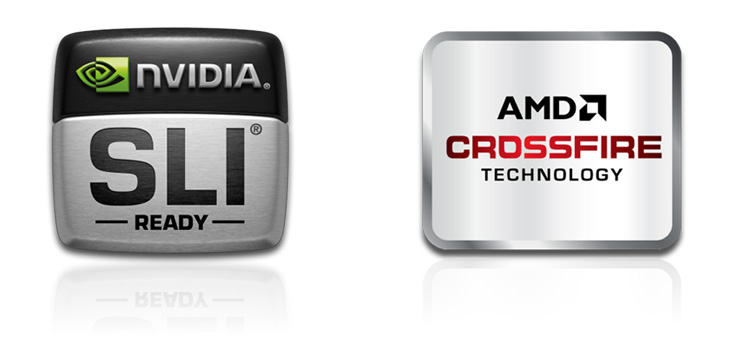
What is SLI (AMD calls it Crossfire)? The term SLI originated from NVidia but is now used as a generic term. It’s the ability to connect multiple graphics cards to play games at much higher frame rates. Gamers should look out for this as should other users that what high end video performance.
Step 7: Decide the storage connections you need
In these exciting times we live in there are several options for hard drive storage: SATA, Express SATA, SSD or the new M.2 SSD. I will explain the differences in an upcoming post but for your motherboard selection think about how many hard drives you’ll be using and what connectors you’ll need.
Try to go for more SATA/Express SATA connectors than you currently need so you have upgrade options for the future. If you intend on using a M.2 SSD, check the motherboard has the slot for it.
Step 8: Check the number and types of I/O ports

Unless you’re using a separate graphics card check the motherboard has the right monitor connections (VGA, DVI or HDMI). Don’t forget the audio connectors and confirm they meet your needs.
USB ports are essential nowadays so get a good balance of USB 2.0 and 3.0 ports. You will see them listed for the back and the front USB header (these are the ones available for the front of your case).
For extreme builds check how many system fan connectors there are on the motherboard. These are 3 or 4 pin connectors that allow the fan speeds to be controlled by the BIOS.
How do you decide which one is the best one?
If you don’t know which one to choose, look for the bonus features that would be nice to have but weren’t on your priority list. Often these features are helpful in making the last decision easier.
The motherboard I chose for this build the GA-Z170-HD3P has an M.2 socket, RAID support, the new Type-C USB 3.1 connector, is in the ultra-durable range, supports overclocking and has a dual BIOS system. These are all features that I wasn’t really looking for but were the extra features that made me choose this motherboard over the other ones in my cart.