How do I install Linux Mint on a Chromebook with a separate home drive?
In this post I’ll install Linux Mint on my Chromebook and give you a quick look at the distro. My Chromebook only has a 16GB hard drive so I’ll use an SD card permanently plugged in to boost home drive storage.
Linux Mint is a hugely popular distro based on Ubuntu 16.04 and according to the developers it’s the 3rd most widely used home operating system behind Microsoft Windows and Apple Mac OS. I wouldn’t be surprised if many Windows XP users switched to Linux Mint after it reached it’s end of life.
I decided to go for the Cinnamon desktop environment which includes some pretty cool menus and layouts and lots of options to customize as you see fit. The general out of the box experience of Linux Mint appeals to both beginners and those users that just want their OS to work. The software management and system updates are designed to provide a stable system for everyday computing.
Linux Mint 18 comes with kernel 4.4, Cinnamon 3.0 and security updates supported until 2021.
Anyway enough jabbering, let’s get to it!
What you’ll need:
- A USB thumb drive to make a bootable Linux drive (minimum 2GB)
- A Chromebook (I’m using the Toshiba Chromebook 2).
- An SD card OR a USB 3.0 thumb drive for extra storage
Step 1: Modify the Chromebook’s BIOS
In order to run Linux on a Chromebook, you’ll need to modify the BIOS so that it allows you to boot from a USB drive. Take a look at this post where I show you how to dual boot Linux and Chrome OS and follow the first 3 steps.
Step 2: Boot into Linux Mint and begin the install
Plug in your SD card or USB 3.0 that you want to be used as your home drive. The PNY elite performance SD card that I’m recommending has excellent read and write speeds and comes at a good price.
If you don’t mind using a USB 3.0 drive and losing that port, I recommend a small and compact one like the Sandisk Ultra Fit 128GB drive. You’ll get faster speeds and USB 3.0 drives are usually cheaper than SD cards.
You’ll also need to plug in your Live linux Mint drive into the other spare USB port on your Chromebook. If you don’t know how to create this you can see my video and written guide.
Start the Chromebook and at the developer screen press Ctrl+L to get to the modified BIOS screen. Choose to boot from your Live linux Mint drive and choose to start Linux Mint.
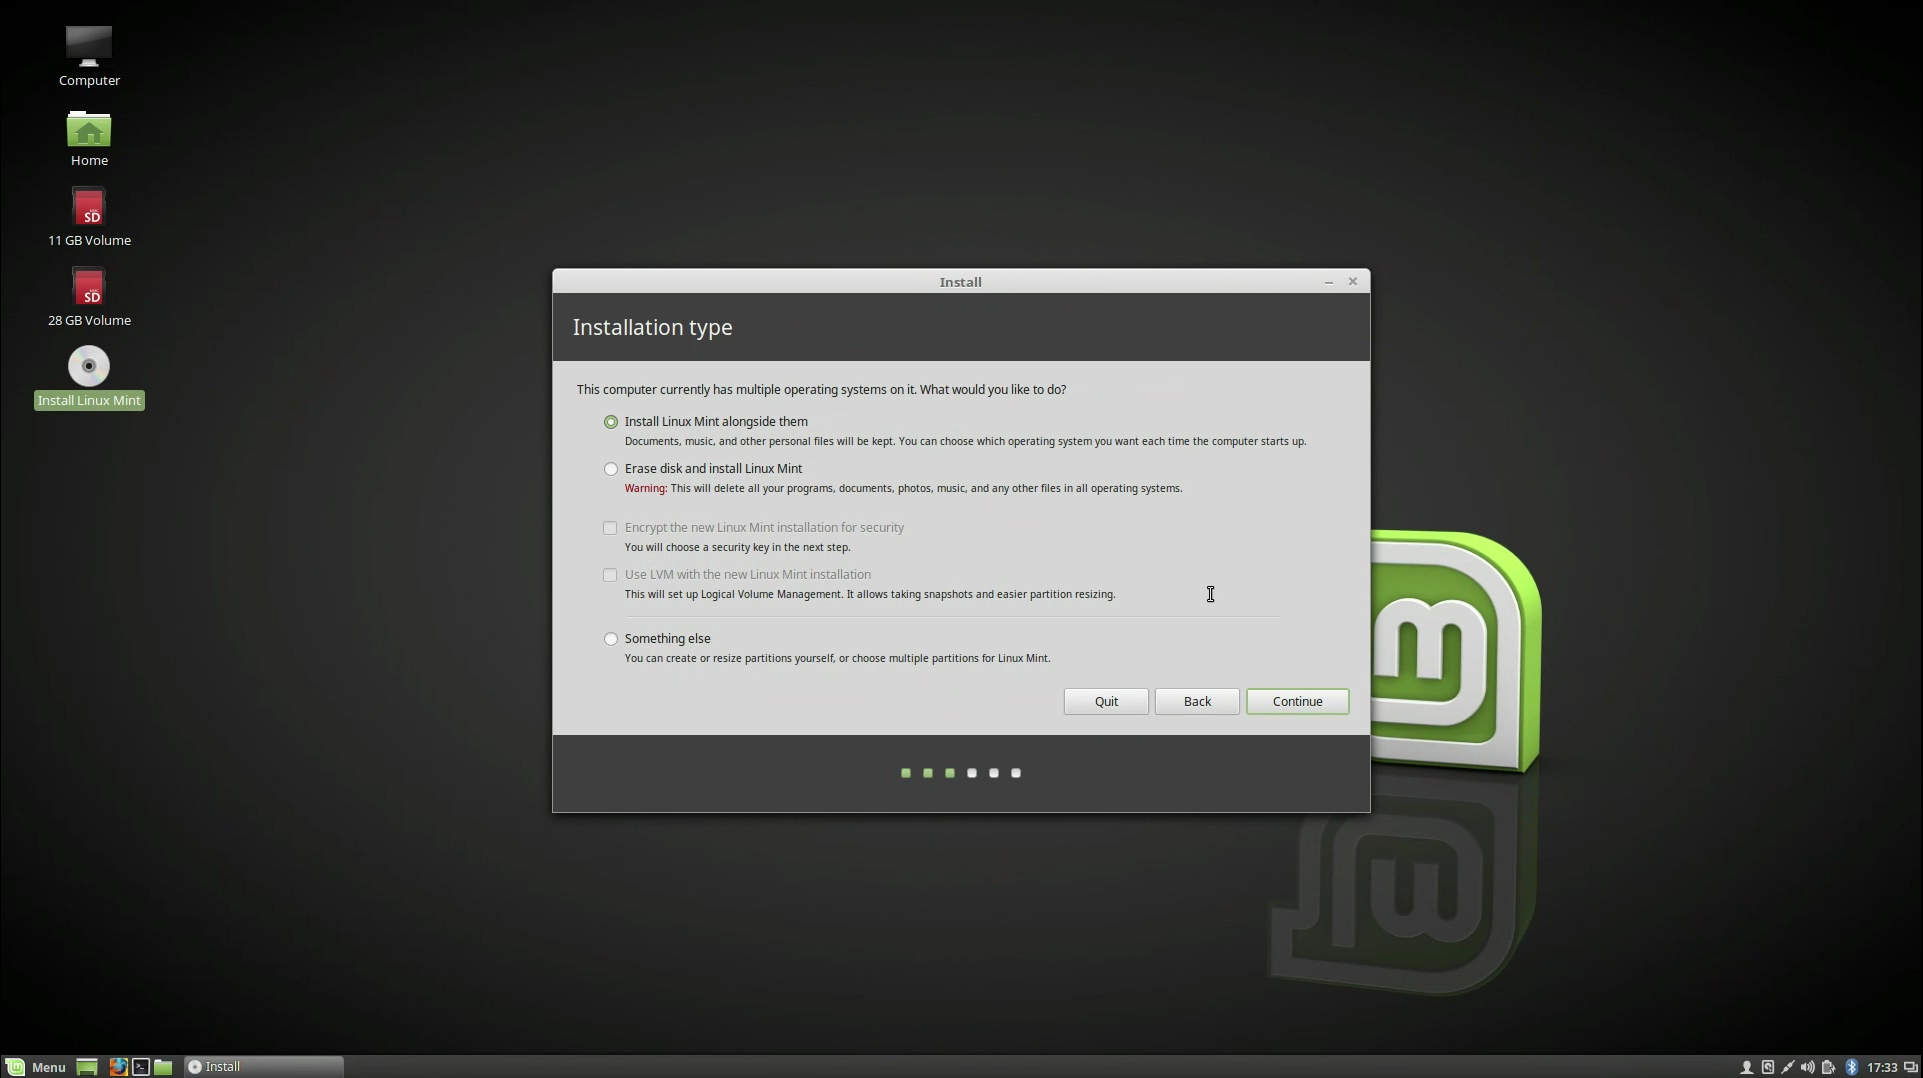
Once you get to the Mint desktop, connect to your wireless connection and make sure the internet works. Now double click the Install Linux Mint icon to begin the install. Follow the on screen prompts until you get to the Installation Type window (I recommend agreeing to install 3rd party software).
Step 3: Choose manual partitioning and use the SD card or USB drive for the home drive
The installation type window is where we can manually setup partitioning of the hard drives. Choose the something else option and you’ll see lots of partitions for the first drive. This is the Chrome OS drive and this is where we’ll install Linux Mint. Choose the new partition table button to wipe all the Chrome OS partitions.
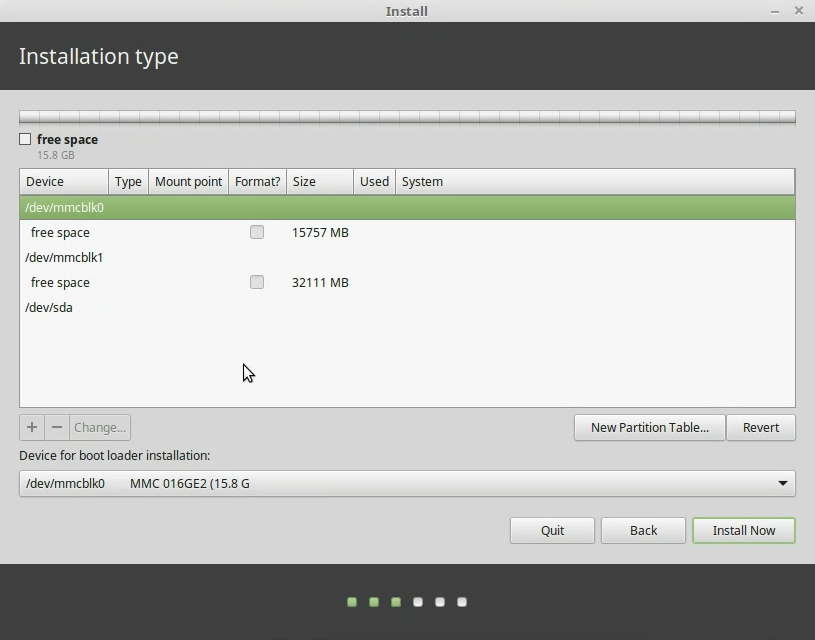
You should now be able to see the other drives more clearly. All drives that begin with sd are USB or SSD drives and drives with mmc in them are SD or eMMC drives.
You can use the + and – buttons to add or remove partitions on drives. Add a swap partition of 4GBs and make the rest of the space the root partition.
Locate your SD card or USB 3.0 drive and make that your home partition. This will be your extra storage for your files and folders while the Chromebook’s internal drive will be for the Linux system.
For the rest of the install, just follow the on screen prompts. When you restart, press Ctrl+L and your Chromebook will boot directly to your Linux Mint install with separate home drive.
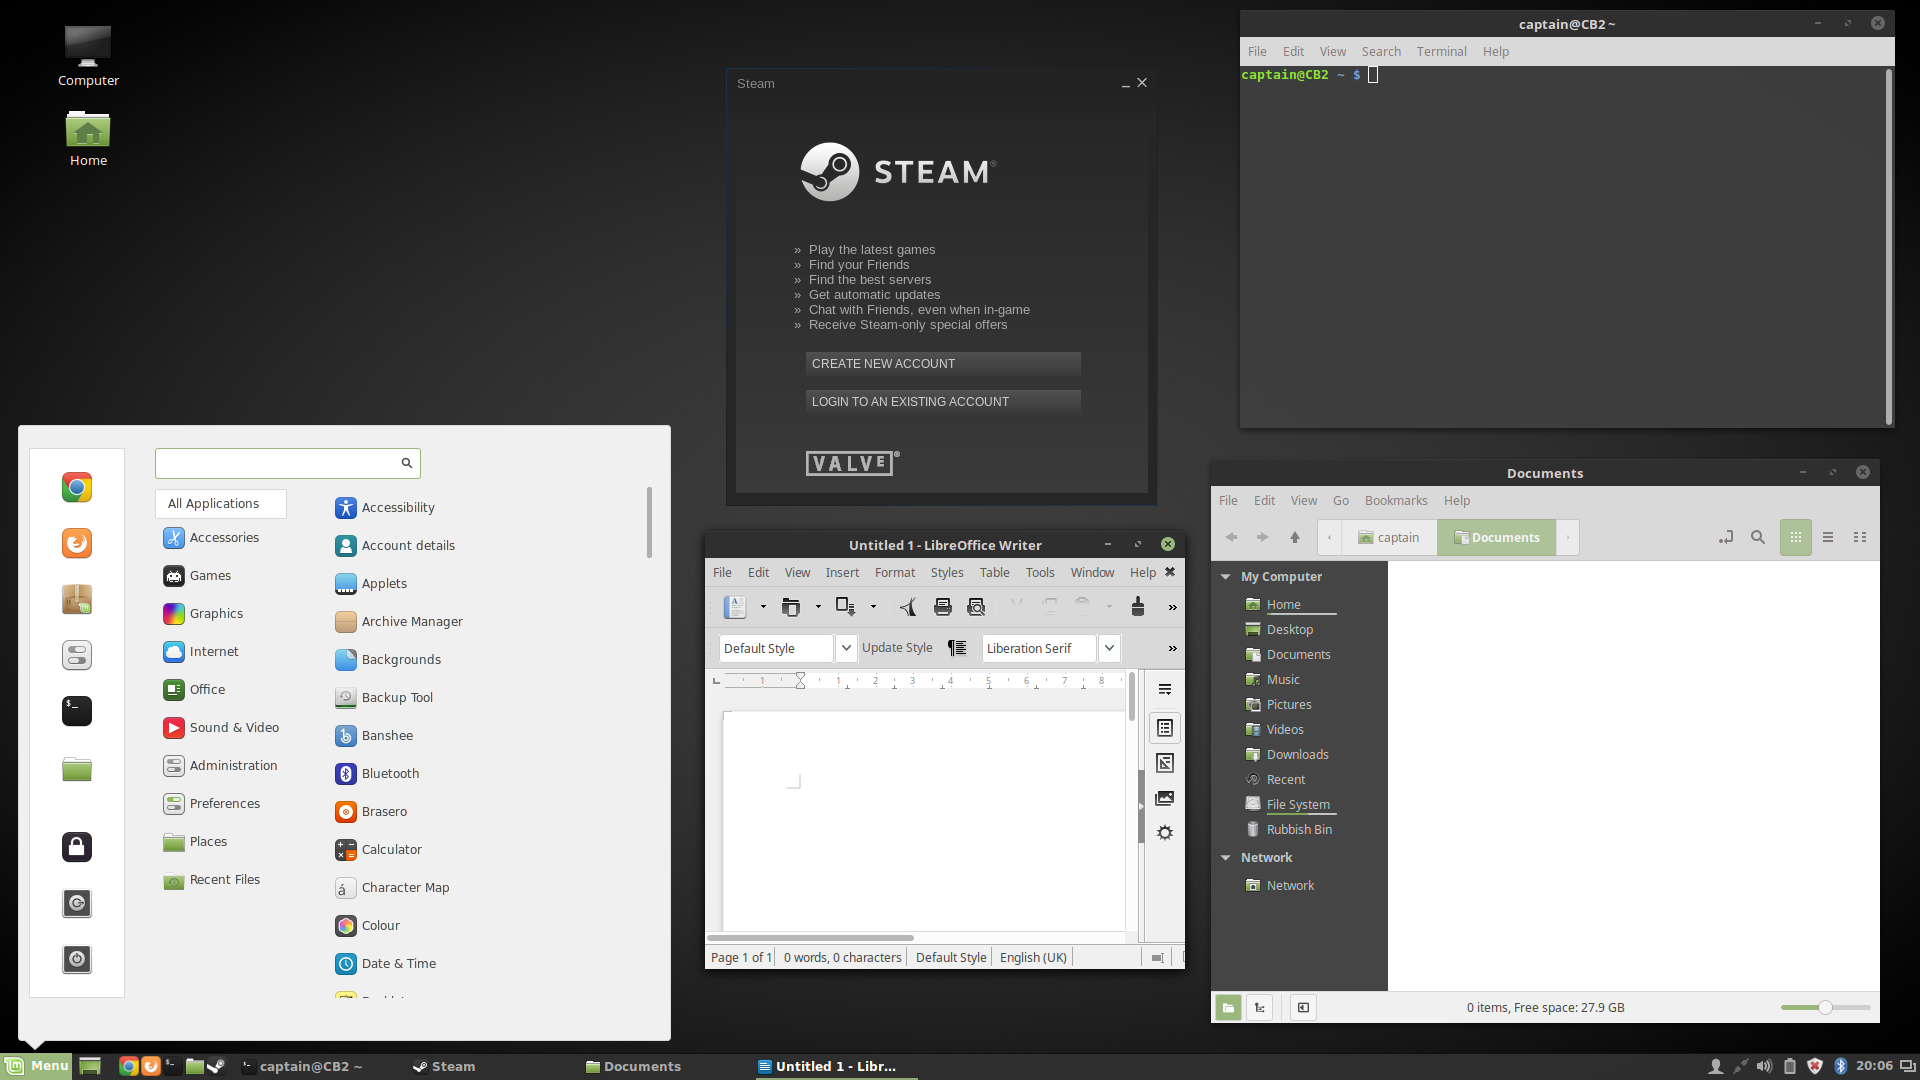
Linux Mint 18 is pretty awesome!
If you look in the Mint menu, you’ll see lots of applications installed by default. Don’t forget to do a system update (you can just type this into the menu and run the update from there). You’ll find lots of software in the software manager (including Steam) and lots of ways you can customize your install.
For beginners, users who want lots of customization options and those that just what something that works out of the box and carries on working, Linux Mint is an outstanding choice.